Stage 3: Loading and moving our enemy planes

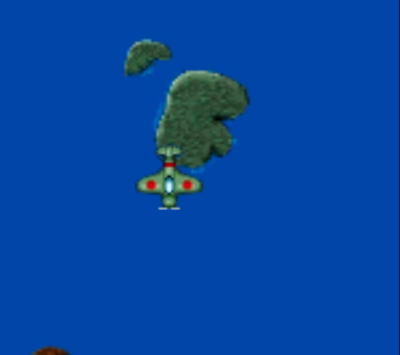
At this point we want to have your enemy planes start to appear. Our code will be almost identical to our landscape code because we want our enemies to appear randomly at the top of the screen and continuously move down until they reach the bottom.
Later we will modify this code for when we shoot them or when they run into our player’s sprite.
Add a new function to our JavaScript code for our enemy planes:
function enemy(file, x, y, width, height, wait) {
  this.wait = wait;
  this.x = x;
  this.y = y;
  this.yspeed = 0;
  this.timeout = false;
  this.xspeed = 0;
  this.width = width;
  this.height = height;
  this.image = new Image();

  this.image.onload = function () {
    loadProgress = loadProgress + 1;
    loadingUpdate();
  };

  this.image.src = "images/" + file;

  this.update = function () {
    this.y = this.y + this.yspeed;
    this.x = this.x + this.xspeed;
    if ((this.y > canvasHeight) && (!this.timeout)) {
      var self = this;
      setTimeout(function () {
        self.y = -100 - self.height;
        self.x =30+Math.random()*(canvasWidth-self.width);
        self.timeout = false;
      }, self.wait);
      this.timeout = true;
    } else {
       ctx.drawImage(this.image,this.x,this.y,this.width,this.height);
    }
  };
}
Above is the bulk of our code but we still need to add in the function calls and change some of our setting. Do this now, first in the global variables at the start of our code:
var landscape1;
var landscape2;
var landscape3;
var numResources = 6;
var loadProgress = 0;
var enemy1;
var enemy2;
var enemy3;
Add then add these three lines to our run loop:
function updateGame() {
  requestID = requestAnimationFrame(updateGame);
  ctx.clearRect(0, 0, canvasWidth, canvasHeight);
  landscape1.update();
  landscape2.update();
  landscape3.update();
  enemy1.update();
  enemy2.update();
  enemy3.update();
}
Finally, add these three lines to our window.onload function:
window.onload = function () {
  gameCanvas = document.getElementById("gameCanvas");
  gameCanvas.width = canvasWidth;
  gameCanvas.height = canvasHeight;
  ctx = gameCanvas.getContext("2d");
  landscape1 = new landscape("island1.gif", Math.random() * canvasWidth, -50, 200, 200, 0);
  landscape2 = new landscape("island2.gif", Math.random() * canvasWidth, -300, 200, 200, 800);
  landscape3 = new landscape("island3.gif", Math.random() * canvasWidth, -500, 200, 200, 1100);
  enemy1=new enemy("enemy1.gif", Math.random()*canvasWidth, -80, 80, 80, 2000);
  enemy2=new enemy("enemy2.gif", Math.random()*canvasWidth, -80, 80, 80, 3000);
  enemy3=new enemy("enemy3.gif", Math.random()*canvasWidth, -80, 80, 80, 10000);
};
You may have noticed that one of the differences between our landscape code and the enemy code is that by default the enemy planes have zero vertical velocity. This is so that our enemy planes don’t start appearing straight away. This gives our landscape a chance to move down the <canvas> before our enemy planes appear later. Therefore, we need some way of setting the speed of our enemy after our game starts.
To do this we will add some lines to our loadingUpdate() function. We use the setTimeout function in JavaScript to run a function after a certain number of milliseconds. Let’s start enemy 1 moving after 4 seconds, enemy 2 after 6 seconds and enemy 3 after 8 seconds, and while we’re at it we will make them all scroll at different speeds. You can adjust these settings to your liking:
function loadingUpdate() {
  if (loadProgress == numResources) {
    requestID = requestAnimationFrame(updateGame);
    setTimeout(function () {
      enemy1.yspeed = 3;
    }, 4000);
    setTimeout(function () {
      enemy2.yspeed = 4;
    }, 6000);
    setTimeout(function () {
      enemy3.yspeed = 5;
    }, 8000);
  }
}
Note about our screen draws using <canvas>
In our game, we are trying to redrawing the screen 60fps. This is our run loop and it will change the location of our islands, enemies, bullets and player. Looking back at our code we first clear the screen then redraw everything again. If you forget to redraw something, even if it hasn’t moved, then it will not appear.
Similarly, if you forget to clear the screen any changes will be superimposed on the old screen. Try running your code without the ctx.clearRect(); command and see what the canvas looks like.
See the examples below for how to choose different ranges:
· For a number between 1 and 100 use: Math.random()*100;
· For a number between 10 and 100 use: Math.random()*90 + 10;
· For a number between -10 and 10 use: Math.random()*20 – 10;
Pseudo-random numbers
It is impossible for computers to choose a random number since the number is always based on some form of calculation/algorithm. Therefore, random numbers created by computers are sometimes called “pseudo-random”. To get around this pseudo-random problem, random number generators can use different starting points for this calculation, called a seed. This seed can be based on some value that seems more random, the more random this “seed” the more random the number.
You will notice the warning on the Mozilla developer page about Math.random() function:
“Math.random() does not provide cryptographically secure random numbers. Do not use them for anything related to security. Use the Web Crypto API instead, and more precisely the window.crypto.getRandomValues() method.”[1]
Random Number Seeds in Minecraft
 You may have seen random number “seeds” in games like Minecraft. When creating a new world Minecraft uses the system time as the “random” starting point for its algorithm but you can override this and use your own “seed”. Every game created using that seed will have the same landscape.
Next time you are playing Minecraft type the command “/seed” to see what the world’s random number seed is.
Move on to stage 4 –>
Jump to: [Vertical Shooter Post: 1 | 2 | 3 | 4 | 5 | 6 | 7 | 8 | 9 | 10 ]
[1] https://developer.mozilla.org/en-US/docs/Web/JavaScript/Reference/Global_Objects/Math/random

