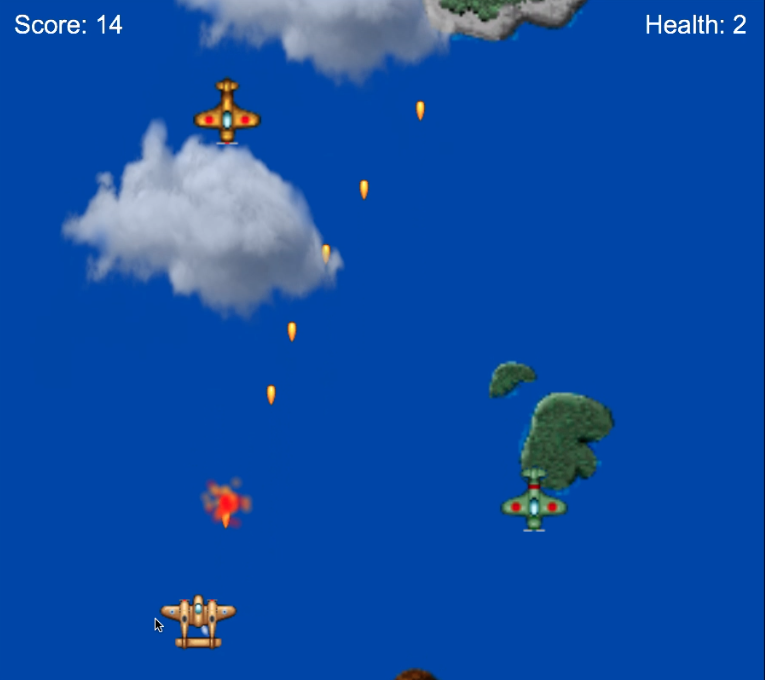
Stage 5: Bullets
As with the other game objects we will create a bullet() function but each bullet will travel up the screen and will spawn when the user clicks the mouse. We will need to create a mouse click event handler that controls the bullet spawn.
The other interesting difference from other objects is that we will create a finite number of bullets, set by the global variable maxBullets. I have set mine to 10 bullets, after that the player must wait till they explode or go off the screen. You might consider making the maxBullets smaller so the game is more difficult. Having a limited number of bullet objects can improving game performance because rather than each time creating a bullet and then destroying it we create an initial number of bullets that can be reused[1].
Our bullet code looks like the following. Add it to the end of our JavaScript file:
function bullet() {
  this.image = new Image();

  this.image.onload = function () {
    loadProgress = loadProgress + 1;
    loadingUpdate();
  };

  this.image.src = "images/bullet.gif";
  this.x = 100;
  this.y = 100;
  this.width = 40;
  this.height = 40;
  this.speed = bulletSpeed;
  this.active = false;

  this.update = function () {
    this.y = this.y + this.speed;
    ctx.drawImage(this.image,this.x,this.y,this.width,this.height);
    if (this.y < -10) {
      this.active = false;
    }
  };

}
Update our global variables to include our new bullet variables (lines 1,7-9):
var numResources = 17;
var loadProgress = 0;
var enemy1;
var enemy2;
var enemy3;
var player;
var bulletSpeed = -6;
var bulletArray = [];
var maxBullets = 10;
Update our run loop updateGame(): (Our for-loop will loop through our bullet array and only update the currently active bullets)
function updateGame() {
  requestID = requestAnimationFrame(updateGame);
  ctx.clearRect(0, 0, canvasWidth, canvasHeight);
  landscape1.update();
  landscape2.update();
  landscape3.update();
  enemy1.update();
  enemy2.update();
  enemy3.update();
  player.update();

  for (var i = 0; i < maxBullets; i++) {
    if (bulletArray[i].active) {
      bulletArray[i].update();
    }
  }

}
To create our mouse click event handler and setup our initial bullet array, place this code into our window.onload function:
window.onload = function () {
gameCanvas = document.getElementById("gameCanvas");
gameCanvas.width = canvasWidth;
gameCanvas.height = canvasHeight;
ctx = gameCanvas.getContext("2d");
landscape1= new landscape("island1.gif", Math.random()*canvasWidth, -50, 200, 200, 0);
landscape2= new landscape("island2.gif", Math.random()*canvasWidth, -300, 200, 200, 800);
landscape3= new landscape("island3.gif", Math.random()*canvasWidth,-500, 200, 200, 1100);
enemy1 = new enemy("enemy1.gif", Math.random() * canvasWidth, -80, 80, 80, 2000);
enemy2 = new enemy("enemy2.gif", Math.random() * canvasWidth, -80, 80, 80, 3000);
enemy3 = new enemy("enemy3.gif", Math.random() * canvasWidth, -80, 80, 80, 10000);
player = new playerPlane("myplane.gif", canvasWidth / 2, canvasHeight / 2, 100, 100);
gameCanvas.addEventListener('mousemove', function (event) {
var mousePos = getMousePos(gameCanvas, event);
player.y = mousePos.y - player.height / 2;
player.x = mousePos.x - player.width / 2;
}, false);
for (var i = 0; i < maxBullets; i++) {
bulletArray[i] = new bullet();
}
gameCanvas.addEventListener('click', function (event) {
var bulletPos={x: player.x+player.width/2, y: player.y+player.height/2};
for (var i = 0; i < maxBullets; i++) {
if (!bulletArray[i].active) {
bulletArray[i].y = bulletPos.y - bulletArray[i].height / 2;
bulletArray[i].x = bulletPos.x - bulletArray[i].width / 2;
bulletArray[i].active = true;
break;
}
}
}, false);
};
Test your game before we move on to developing the next 5 stages.
1) “Block-Level” is only available inside a block of code such as between an if { }else{ } block. Any variables that are declared inside an IF statement or a WHILE loop have Block-Level scope.
2) “Method-Level” is available only inside the method/ function that it was created in.
3) “Private” access is only available to methods in the class that the variable is defined in. Placing the public keyword in front of a variable declaration defines a private variable.
4) “Protected” access variables are only available to the class that it is defined in as well as any sub-classes.
5) “Public” access is available to all classes. Variables with the public keyword in front of their declaration are available to all classes.
In JavaScript, there is only global and local scope. Any variable declared inside a function is local to that function; any declared outside of a function are global. The only exception to this is a variable declared without the var keyword inside a function. Variables declared without var are placed in the global scope, no matter where they are declared.
When choosing the scope for your variable it is generally desirable to choose the narrowest scope possible, such as “Block” or “Method”. In the case of JavaScript the narrowest scope would be “local”.
Choosing the narrowest scope uses the least amount of system resources[1], allows for easier code reuse, reduces the chance of variable naming collisions and makes debugging easier.
The other advantage of using a narrow scope is that you can name another variable outside that scope with the same variable name. For example, you could have many variables called counter that only exist inside different while loops or functions (ie each variable counter has a block-level scope, or “local”).
Move on to stage 6 –>
Jump to: [Vertical Shooter Post: 1 | 2 | 3 | 4 | 5 | 6 | 7 | 8 | 9 | 10 ]
[1] Having a set number of reusable objects is sometimes called “pooling”. It can be CPU “expensive” to create a new object instance each time and then delete it after use, so one method is to create a pool of objects that get reused. We then only need to turn them on or off somehow. In our case we use a local variable on each bullet called “active”. By default our 10 bullets have active set to false.
